Como fazer: Conexão Bluetooth entre ESP32 e Raspberry Pi
How-To: Bluetooth Connection between ESP32’s and Raspberry Pi’s (tutorials-raspberrypi.com)
O Bluetooth é uma das ferramentas de conectividade sem fio de curto alcance mais eficientes para troca de dados usando ondas de rádio de frequência ultra-alta (normalmente de 2,4 GHz) e construção de redes pessoais (PAN). Fundamentalmente, a tecnologia Bluetooth foi construída como um sistema de substituição de cabos, portanto seu uso em sistemas embarcados é inevitável. A maioria dos microcontroladores famosos como ESP32, Raspberry Pi, Arduino Mega possuem módulos Bluetooth integrados, outros microcontroladores podem ser adaptados com módulos como HC 05 ou JDY-30 para torná-los compatíveis com Bluetooth. Este artigo ajudará você a entender o conhecimento básico sobre o funcionamento dos módulos Bluetooth entre dois ESP32s e a conectividade entre o Raspberry Pi e o ESP32.
Conteudo
Componentes necessários
Você vai precisar das seguintes coisas:
- Raspberry Pi* com biblioteca PYQT instalada
- IDE do Arduino
- Duas placas de desenvolvimento ESP32*
- Aplicativo NRF (App Store, Play Store)
- Cabo USB para ESP32
Bluetooth de baixa energia (BLE)
A maioria dos microcontroladores, incluindo Raspberry Pi e ESP32, possui módulos Bluetooth baseados na tecnologia Bluetooth Low-Energy. BLE é uma variante de baixo consumo de energia do Bluetooth, ao contrário do Bluetooth clássico, é projetado para um alcance muito curto e uma pequena largura de banda de dados a serem transferidos a uma pequena distância. Como é muito bom em economia de energia, usa quase 100 vezes menos energia em comparação com o Bluetooth clássico com um comprometimento muito pequeno de desempenho. O BLE está em modo de suspensão, a menos que uma conexão seja feita ou seja necessária na transferência de dados em comparação com o Bluetooth clássico que está sempre ligado.
Funciona em quatro modos:
- Periférico – É basicamente um dispositivo que divulga os dados, mas também pode ser usado para se conectar a dispositivos remotos
- Broadcaster -É o dispositivo cuja única finalidade é divulgar dados.
- Observer -Dispositivo que apenas verifica os dados.
- Central – Este é um dispositivo que tem dupla finalidade e pode verificar dados e conectar-se a eles
Quando o BLE foi introduzido, os dois primeiros modos foram utilizados por sensores e outros equipamentos industriais e os dois últimos foram usados por computadores de telefones celulares. No entanto, com a evolução da tecnologia agora, a maioria dos BLE fornece todos os quatro modos de transferência. O ESP32 e o Raspberry Pi também fornecem esses quatro modos de transferência. Você pode ver a diferença significativa entre o clássico e o BLE na tabela abaixo (Obtido na Internet).

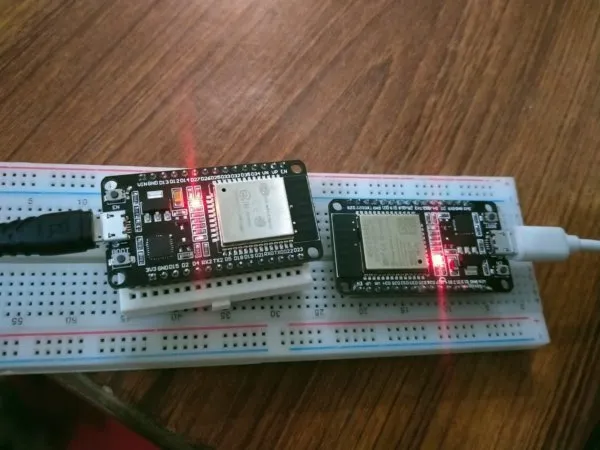
Conexão entre dois ESP32’s
Dois ESP32s podem ser conectados de maneira muito otimizada usando o recurso BLE. A conexão Bluetooth entre duas placas será estabelecida de forma que uma placa atuará como servidor e a outra atuará como cliente. Um ESP32 atuará como servidor e anunciará os dados e iniciará a conexão, o segundo ESP32 atuará como cliente e receberá os dados do servidor. Estaremos enviando algumas strings de um esp32 para o outro usando conexão BLE.
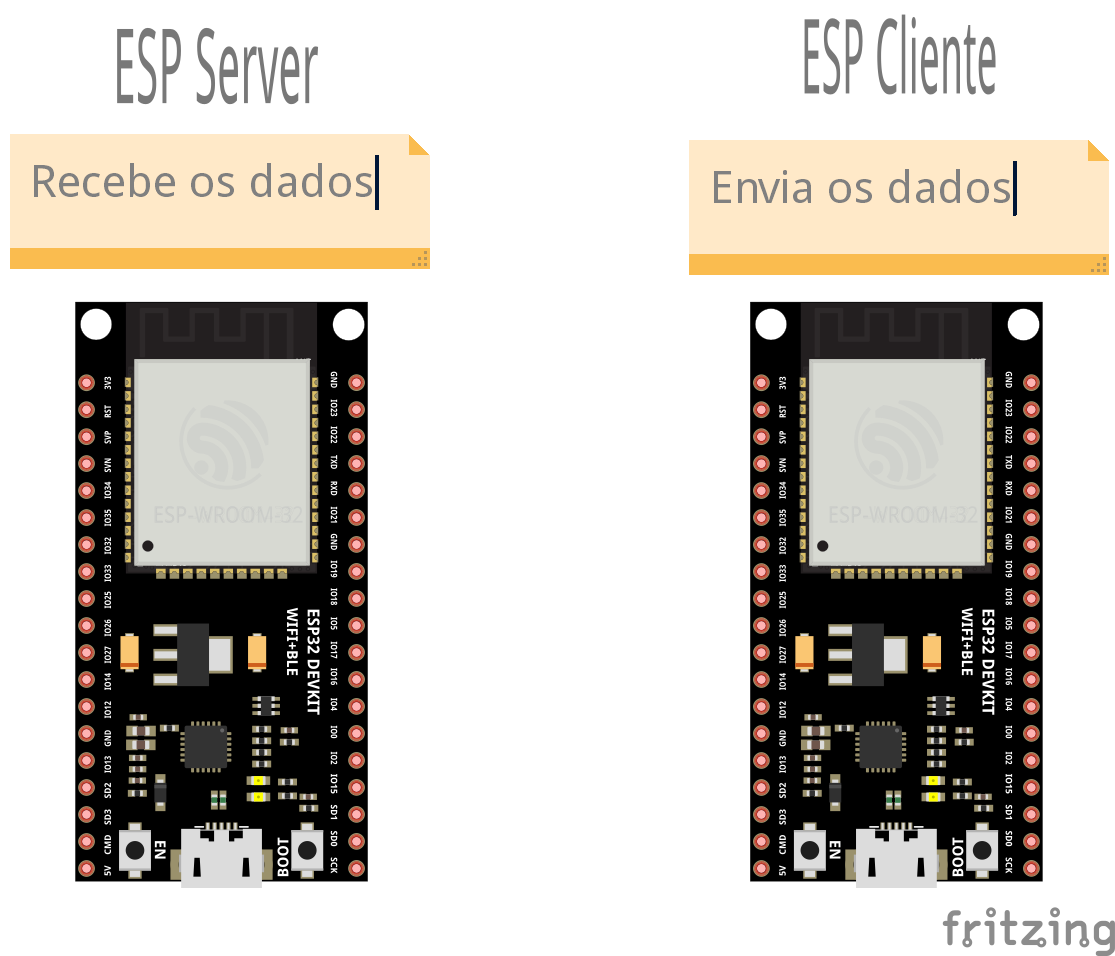
ESP32 como servidor
Nosso primeiro ESP32 atuará como servidor Bluetooth. Ele fornecerá a conexão e os dados para o cliente. Seu código é o seguinte:
#include <BLEUtils.h>
#include <BLEServer.h>

// Consulte o seguinte para gerar UUIDs:
// https://www.uuidgenerator.net/

#define SERVICE_UUID        "f154a48c-ed05-4c4b-aff6-bd2333fb9f7b"
#define CHARACTERISTIC_UUID "8903709e-270c-4612-9726-4ca1a8c3b7ab"

void setup() {
  Serial.begin(115200);
  Serial.println("Starting BLE work!");

  BLEDevice::init("ESP32 AS A BLE");
  BLEServer *pServer = BLEDevice::createServer();
  BLEService *pService = pServer->createService(SERVICE_UUID);
  BLECharacteristic *pCharacteristic = pService->createCharacteristic(
                                         CHARACTERISTIC_UUID,
                                         BLECharacteristic::PROPERTY_READ |
                                         BLECharacteristic::PROPERTY_WRITE
                                       );

  pCharacteristic->setValue("Hi,other ESP32 here is your data");
  pService->start();
  // BLEAdvertising *pAdvertising = pServer->getAdvertising();  // this still is working for backward compatibility
  BLEAdvertising *pAdvertising = BLEDevice::getAdvertising();
  pAdvertising->addServiceUUID(SERVICE_UUID);
  pAdvertising->setScanResponse(true);
  pAdvertising->setMinPreferred(0x06);
  pAdvertising->setMinPreferred(0x12);
  BLEDevice::startAdvertising();
  Serial.println("Characteristic defined!");
}

void loop() {
  // put your main code here, to run repeatedly:
  delay(2000);
}
Este código está usando a classe BLE para criar seus objetos como características, BLE e objetos de publicidade. Possui UUID de Característica e de Serviço no início. UUID, um acrônimo de Universally Unique ID, e corresponde a um número único que é usado para identificar serviços e características que um dispositivo Bluetooth deve fornecer. Primeiro neste código criamos três objetos da classe BLEserver, BLEcharacteristic e BLEService respectivamente e os inicializamos com seus valores requeridos. Em seguida, simplesmente usamos a função de início de publicidade da classe de dispositivo BLE para iniciar nosso servidor Bluetooth com o UUID, características e serviços específicos que inicializamos. Você pode definir qualquer dado, como qualquer dado do sensor ou qualquer outro dado necessário, e começar a anunciá-lo. Uma vez que este servidor é iniciado, você pode acessá-lo mesmo em seu celular usando o nRF Connect em apenas duas etapas conforme abaixo:
Etapa 1: Abra o scanner e conecte-se ao seu dispositivo Bluetooth

Etapa 2: Após conectar ao seu ESP32, você pode verificar a característica, e ele estará exibindo seu texto escrito.

ESP32 como cliente
Como o nome indica, o segundo esp32 atuará como cliente e acessará os dados do servidor. Ele deve apenas fornecer os UUIDs de características e serviços para se conectar ao servidor e acessar os serviços especificados fornecidos pelo servidor esp32.
Seu código é assim:
#include "BLEDevice.h"
//#include "BLEScan.h"

// The remote service we wish to connect to.
static BLEUUID serviceUUID("4fafc201-1fb5-459e-8fcc-c5c9c331914b");
// The characteristic of the remote service we are interested in.
static BLEUUID    charUUID("beb5483e-36e1-4688-b7f5-ea07361b26a8");

static boolean doConnect = false;
static boolean connected = false;
static boolean doScan = false;
static BLERemoteCharacteristic* pRemoteCharacteristic;
static BLEAdvertisedDevice* myDevice;

static void notifyCallback(
  BLERemoteCharacteristic* pBLERemoteCharacteristic,
  uint8_t* pData,
  size_t length,
  bool isNotify) {
    Serial.print("Notify callback for characteristic ");
    Serial.print(pBLERemoteCharacteristic->getUUID().toString().c_str());
    Serial.print(" of data length ");
    Serial.println(length);
    Serial.print("data: ");
    Serial.println((char*)pData);
}

class MyClientCallback : public BLEClientCallbacks {
  void onConnect(BLEClient* pclient) {
  }

  void onDisconnect(BLEClient* pclient) {
    connected = false;
    Serial.println("onDisconnect");
  }
};

bool connectToServer() {
    Serial.print("Forming a connection to ");
    Serial.println(myDevice->getAddress().toString().c_str());

    BLEClient*  pClient  = BLEDevice::createClient();
    Serial.println(" - Created client");

    pClient->setClientCallbacks(new MyClientCallback());

    // Connect to the remove BLE Server.
    pClient->connect(myDevice);  // if you pass BLEAdvertisedDevice instead of address, it will be recognized type of peer device address (public or private)
    Serial.println(" - Connected to server");

    // Obtain a reference to the service we are after in the remote BLE server.
    BLERemoteService* pRemoteService = pClient->getService(serviceUUID);
    if (pRemoteService == nullptr) {
      Serial.print("Failed to find our service UUID: ");
      Serial.println(serviceUUID.toString().c_str());
      pClient->disconnect();
      return false;
    }
    Serial.println(" - Found our service");


    // Obtain a reference to the characteristic in the service of the remote BLE server.
    pRemoteCharacteristic = pRemoteService->getCharacteristic(charUUID);
    if (pRemoteCharacteristic == nullptr) {
      Serial.print("Failed to find our characteristic UUID: ");
      Serial.println(charUUID.toString().c_str());
      pClient->disconnect();
      return false;
    }
    Serial.println(" - Found our characteristic");

    // Read the value of the characteristic.
    if(pRemoteCharacteristic->canRead()) {
      std::string value = pRemoteCharacteristic->readValue();
      Serial.print("The characteristic value was: ");
      Serial.println(value.c_str());
    }

    if(pRemoteCharacteristic->canNotify())
      pRemoteCharacteristic->registerForNotify(notifyCallback);

    connected = true;
    return true;
}
/**
* Scan for BLE servers and find the first one that advertises the service we are looking for.
*/
class MyAdvertisedDeviceCallbacks: public BLEAdvertisedDeviceCallbacks {
/**
   * Called for each advertising BLE server.
   */
  void onResult(BLEAdvertisedDevice advertisedDevice) {
    Serial.print("BLE Advertised Device found: ");
    Serial.println(advertisedDevice.toString().c_str());

    // We have found a device, let us now see if it contains the service we are looking for.
    if (advertisedDevice.haveServiceUUID() && advertisedDevice.isAdvertisingService(serviceUUID)) {

      BLEDevice::getScan()->stop();
      myDevice = new BLEAdvertisedDevice(advertisedDevice);
      doConnect = true;
      doScan = true;

    } // Found our server
  } // onResult
}; // MyAdvertisedDeviceCallbacks


void setup() {
  Serial.begin(115200);
  Serial.println("Starting Arduino BLE Client application...");
  BLEDevice::init("");

  // Retrieve a Scanner and set the callback we want to use to be informed when we
  // have detected a new device.  Specify that we want active scanning and start the
  // scan to run for 5 seconds.
  BLEScan* pBLEScan = BLEDevice::getScan();
  pBLEScan->setAdvertisedDeviceCallbacks(new MyAdvertisedDeviceCallbacks());
  pBLEScan->setInterval(1349);
  pBLEScan->setWindow(449);
  pBLEScan->setActiveScan(true);
  pBLEScan->start(5, false);
} // End of setup.


// This is the Arduino main loop function.
void loop() {

  // If the flag "doConnect" is true then we have scanned for and found the desired
  // BLE Server with which we wish to connect.  Now we connect to it.  Once we are
  // connected we set the connected flag to be true.
  if (doConnect == true) {
    if (connectToServer()) {
      Serial.println("We are now connected to the BLE Server.");
    } else {
      Serial.println("We have failed to connect to the server; there is nothin more we will do.");
    }
    doConnect = false;
  }

  // If we are connected to a peer BLE Server, update the characteristic each time we are reached
  // with the current time since boot.
  if (connected) {
    String newValue = "Time since boot: " + String(millis()/1000);
    Serial.println("Setting new characteristic value to \"" + newValue + "\"");

    // Set the characteristic's value to be the array of bytes that is actually a string.
    pRemoteCharacteristic->writeValue(newValue.c_str(), newValue.length());
  }else if(doScan){
    BLEDevice::getScan()->start(0);  // this is just example to start scan after disconnect, most likely there is better way to do it in arduino
  }

  delay(1000); // Delay a second between loops.
} // End of loop
Este código está contando com algumas funções definidas pelo usuário. Definimos Característica e UUID de serviço no início do código. Objetos de BLERemoteCharacteristic, classes BLEAdvertisedDevice são feitas no início e a função connectToServer() é usada para conectar ao servidor (outro esp32). Ele finalmente busca todos os dados fornecidos pelo servidor usando variáveis de característica e serviço. O monitor serial exibirá os seguintes valores como:
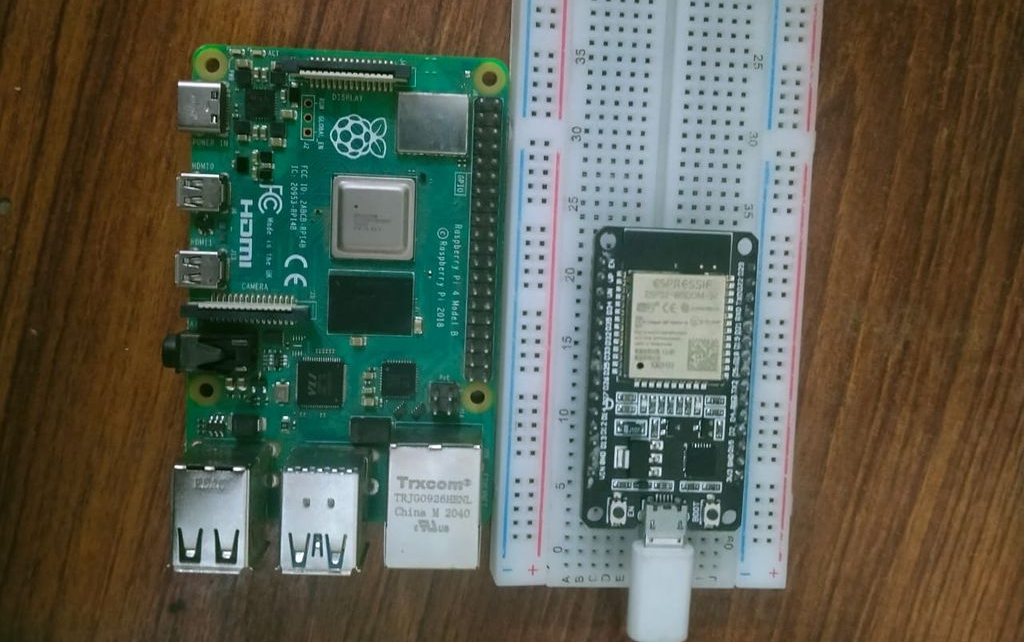
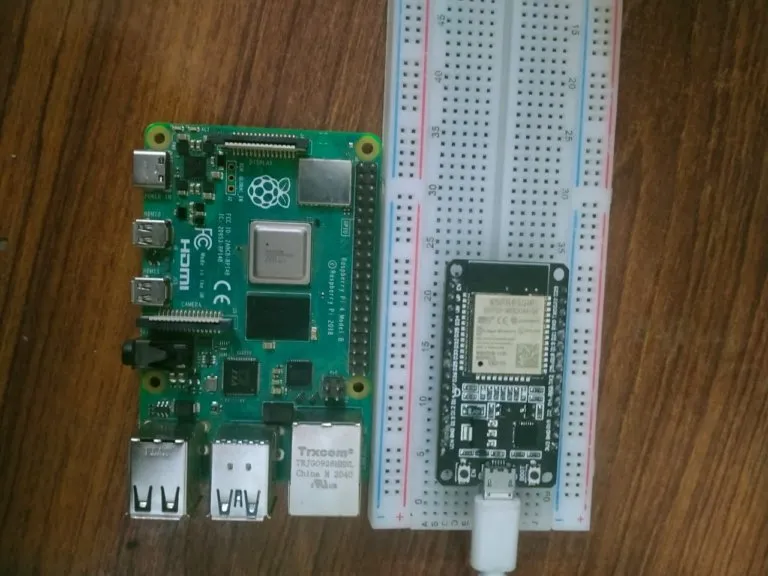
Conexão entre ESP32 e Raspberry Pi
Conexão ESP32: Nosso ESP32 estará executando uma conexão UART no Bluetooth. Portanto, ele poderá se comunicar de duas maneiras com o Raspberry Pi.
Nosso código é assim:
#include <BLEDevice.h>
#include <BLEServer.h>
#include <BLEUtils.h>
#include <BLE2902.h>
BLEServer *pServer = NULL;
BLECharacteristic * pTxCharacteristic;
bool deviceConnected = false;
bool oldDeviceConnected = false;
uint8_t txValue = 0;
// See the following for generating UUIDs:
// https://www.uuidgenerator.net/
#define SERVICE_UUID "6E400001-B5A3-F393-E0A9-E50E24DCCA9E" // UART service UUID
#define CHARACTERISTIC_UUID_RX "6E400002-B5A3-F393-E0A9-E50E24DCCA9E"
#define CHARACTERISTIC_UUID_TX "6E400003-B5A3-F393-E0A9-E50E24DCCA9E"
class MyServerCallbacks: public BLEServerCallbacks {
void onConnect(BLEServer* pServer) {
deviceConnected = true;
};
void onDisconnect(BLEServer* pServer) {
deviceConnected = false;
}
};
class MyCallbacks: public BLECharacteristicCallbacks {
void onWrite(BLECharacteristic *pCharacteristic) {
std::string rxValue = pCharacteristic->getValue();
if (rxValue.length() > 0) {
Serial.println("*********");
Serial.print("Received Value: ");
for (int i = 0; i < rxValue.length(); i++)
Serial.print(rxValue[i]);
Serial.println();
Serial.println("*********");
}
}
};
void setup() {
Serial.begin(115200);
// Create the BLE Device
BLEDevice::init("UART Service For ESP32");
// Create the BLE Server
pServer = BLEDevice::createServer();
pServer->setCallbacks(new MyServerCallbacks());
// Create the BLE Service
BLEService *pService = pServer->createService(SERVICE_UUID);
// Create a BLE Characteristic
pTxCharacteristic = pService->createCharacteristic(
CHARACTERISTIC_UUID_TX,
BLECharacteristic::PROPERTY_NOTIFY
);
pTxCharacteristic->addDescriptor(new BLE2902());
BLECharacteristic * pRxCharacteristic = pService->createCharacteristic(
CHARACTERISTIC_UUID_RX,
BLECharacteristic::PROPERTY_WRITE
);
pRxCharacteristic->setCallbacks(new MyCallbacks());
// Start the service
pService->start();
// Start advertising
pServer->getAdvertising()->start();
Serial.println("Waiting a client connection to notify...");
}
void loop() {
if (deviceConnected) {
pTxCharacteristic->setValue(&txValue, 1);
pTxCharacteristic->notify();
txValue++;
delay(10); // bluetooth stack will go into congestion, if too many packets are sent
}
// disconnecting
if (!deviceConnected && oldDeviceConnected) {
delay(500); // give the bluetooth stack the chance to get things ready
pServer->startAdvertising(); // restart advertising
Serial.println("start advertising");
oldDeviceConnected = deviceConnected;
}
// connecting
if (deviceConnected && !oldDeviceConnected) {
// do stuff here on connecting
oldDeviceConnected = deviceConnected;
}
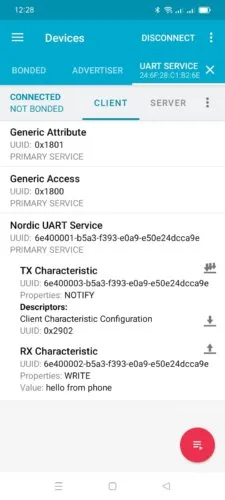
}Este código tem duas partes, uma está transmitindo quaisquer dados aleatórios em um loop. O outro está recebendo dados. No início, definimos duas características como RX e TX, depois definimos e atribuímos valores adequados de acordo com nossa necessidade. Como estamos usando UART, podemos transmitir e receber simultaneamente sem qualquer obstrução. Você pode testar um lado da conexão usando o aplicativo NRF (link da App Store: https://apps.apple.com/us/app/nrf-connect-for-mobile/id1054362403 Link da Play Store: https://play.google.com/store/apps/details?id=no.nordicsemi.android.mcp). Carregue o código acima e abra o aplicativo NRF Connector, conecte-se ao UART-SERVICE como:

Depois de conectar o tipo, o valor que você deseja enviar para o monitor serial. Seu valor será enviado para o monitor serial.

Conexão Raspberry Pi:
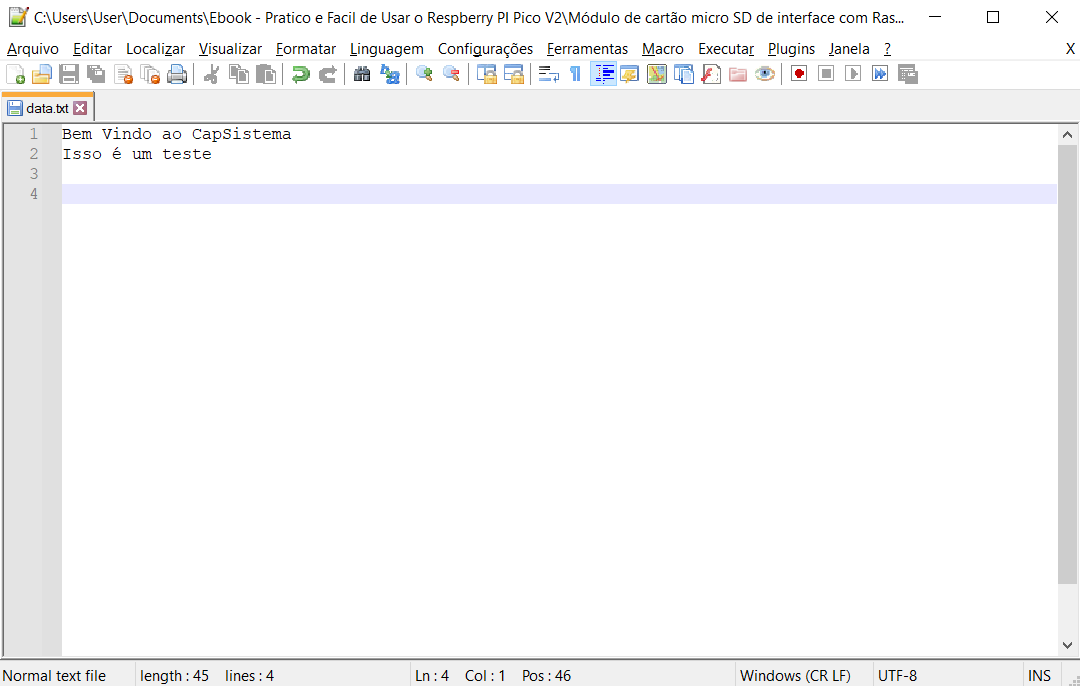
Raspberry Pi está executando um script de python usando bluepy (uma biblioteca especial de raspberry pi para usar o modo BLE). Basicamente, este código desenvolve uma GUI básica que ajuda a enviar e receber dados do esp. 32. Você deve instalar as bibliotecas PYQT e bluepy antes de continuar. Depois de configurar isso, basta executar este código e uma interface gráfica do usuário será exibida na tela. Então você pode inserir os dados para enviar pelo BLE para o ESP32, ou ele estará exibindo os dados recebidos do esp32. Esta conexão é uma UART (receptor-transmissor universal assíncrono). O que significa que tem ambos os recursos para enviar e receber dados ao mesmo tempo. Na primeira caixa de texto você receberá os dados do esp. 32 e na segunda caixa de texto você escreverá os dados a serem enviados do Raspberry Pi.

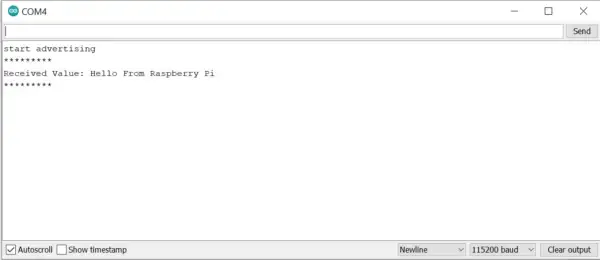
No monitor de comunicação serial ESP32 temos:
import sys
import time

import requests
from PyQt5.QtCore import QObject, QRunnable, QThreadPool, QTimer, pyqtSignal, pyqtSlot
from PyQt5.QtWidgets import (
    QApplication, QLabel, QMainWindow,  QPlainTextEdit, QPushButton, QVBoxLayout, QWidget,
    )

from bluepy import btle

class WorkerSignals(QObject):
    signalMsg = pyqtSignal(str)
    signalRes = pyqtSignal(str)

class MyDelegate(btle.DefaultDelegate):

    def __init__(self, sgn):
        btle.DefaultDelegate.__init__(self)
        self.sgn = sgn

    def handleNotification(self, cHandle, data):

        try:
            dataDecoded = data.decode()
            self.sgn.signalRes.emit(dataDecoded)
        except UnicodeError:
            print("UnicodeError: ", data)

class WorkerBLE(QRunnable):

    def __init__(self):
        super().__init__()
        self.signals = WorkerSignals()
        self.rqsToSend = False

    @pyqtSlot()
    def run(self):
        self.signals.signalMsg.emit("WorkerBLE start")

        #---------------------------------------------
        p = btle.Peripheral("3c:71:bf:0d:dd:6a")
        p.setDelegate( MyDelegate(self.signals) )

        svc = p.getServiceByUUID("6E400001-B5A3-F393-E0A9-E50E24DCCA9E")
        self.ch_Tx = svc.getCharacteristics("6E400002-B5A3-F393-E0A9-E50E24DCCA9E")[0]
        ch_Rx = svc.getCharacteristics("6E400003-B5A3-F393-E0A9-E50E24DCCA9E")[0]

        setup_data = b"\x01\00"
        p.writeCharacteristic(ch_Rx.valHandle+1, setup_data)

        # BLE loop --------

        while True:
            """
            if p.waitForNotifications(1.0):
                # handleNotification() was called
                continue

            print("Waiting...")
            """

            p.waitForNotifications(1.0)

            if self.rqsToSend:
                self.rqsToSend = False

                try:
                    self.ch_Tx.write(self.bytestosend, True)
                except btle.BTLEException:
                    print("btle.BTLEException");

        #---------------------------------------------hellohello
        self.signals.signalMsg.emit("WorkerBLE end")

    def toSendBLE(self, tosend):
        self.bytestosend = bytes(tosend, 'utf-8')
        self.rqsToSend = True
        """
        try:
            self.ch_Tx.write(bytestosend, True)
        except BTLEException:
            print("BTLEException");
        """

class MainWindow(QMainWindow):

    def __init__(self):
        super().__init__()

        layout = QVBoxLayout()

        buttonStartBLE = QPushButton("Start BLE")
        buttonStartBLE.pressed.connect(self.startBLE)

        self.console = QPlainTextEdit()
        self.console.setReadOnly(True)

        self.outconsole = QPlainTextEdit()

        buttonSendBLE = QPushButton("Send message")
        buttonSendBLE.pressed.connect(self.sendBLE)

        layout.addWidget(buttonStartBLE)
        layout.addWidget(self.console)
        layout.addWidget(self.outconsole)
        layout.addWidget(buttonSendBLE)

        w = QWidget()
        w.setLayout(layout)

        self.setCentralWidget(w)

        self.show()
        self.threadpool = QThreadPool()
        print(
            "Multithreading with Maximum %d threads" % self.threadpool.maxThreadCount())

    def startBLE(self):
        self.workerBLE = WorkerBLE()
        self.workerBLE.signals.signalMsg.connect(self.slotMsg)
        self.workerBLE.signals.signalRes.connect(self.slotRes)
        self.threadpool.start(self.workerBLE)

    def sendBLE(self):
        strToSend = self.outconsole.toPlainText()
        self.workerBLE.toSendBLE(strToSend)

    def slotMsg(self, msg):
        print(msg)

    def slotRes(self, res):
        self.console.appendPlainText(res)

app = QApplication(sys.argv)
window = MainWindow()
app.exec()
Usos práticos na indústria
O BLE é muito benéfico nos lugares onde não temos energia suficiente para fornecer. Vamos discutir algumas de suas aplicações práticas:
Sistema Agrícola Inteligente: Um microcontrolador como ESP32 ou Raspberry Pi com capacidade de ble pode ser usado em baterias por semanas para transferir todos os dados dos sensores de um esp32 para outro esp32 para tomar ações significativas para o crescimento adequado de culturas/plantas (como ligar o luzes ou ligar o motor)
Treinadores esportivos: Um microcontrolador pode ser usado para enviar dados como batimentos cardíacos, velocidade de corrida ou quaisquer outros dados medidos através de sensores via Bluetooth para o celular ou simplesmente exibir na tela como no máximo 7219. Eles podem monitorar facilmente todos esses valores com eficiência sem qualquer fiação.
Sistemas de monitoramento de saúde: Pulseiras para medir diferentes dados, como batimentos cardíacos, pressão arterial e outras coisas como essa, podem ser transferidas diretamente para um computador usando o recurso BLE de um microcontrolador.
Automação Residencial: A automação residencial é um dos presentes que os microcontroladores compactos tornaram possíveis. Os dispositivos BLE podem ser usados para fazer coisas muito inovadoras, desde o controle de luzes até a fabricação de portas com trava de impressão digital, tudo é possível. Algumas de suas aplicações interessantes são:
- Lembretes para aparelhos como fogões, bombas de água, aquecedores, gêiseres para desligá-los em um determinado momento
- Câmeras de segurança controladas por dispositivos móveis
- Portas de garagem automatizadas com controle móvel (usando esp. 32 ou Raspberry Pi)
- Coleta de dados de diferentes sensores da casa (fogo, água, movimento, luz)


